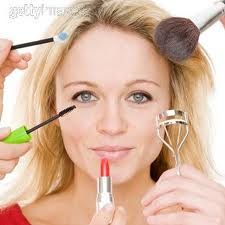
In today’s world we all want to look our best whether we are going out for the night,
going to work or simply going for a walk with friends. All these activities require different looks which means they require different application style of make up. Follow these steps to get a professional look whatever the occasion.
Step 1
Determine your skin type. applying make like a professional has a lot to do your skin type and the compatibility of the make up you are using. If you have oily or combination skin you may want to try a product such as 
. This product is specially formulated to gently cleanse the skin and fight bacteria . It utilises a special blend of natural ingredients from the dead sea. It should be used daily to prevent the appearance of blemishes, spots and blackheads and it also removes any trace of make up. You can also use this product if you have dry skin as it removes the dead skin cells gently and gives the appearance of fresh new skin.
If you have Acne prone skin I would highly recommend using a natural product such as Acne Mud Soap - Original Dead Sea Treatment
Please do not try to cover up your acne by using heavy make up as this blocks the pores and does not allow your skin to breathe. Also using chemical cleansers on your acne can cause it to flare up so be careful about the products you use. Use this soap for a few days and try to us a light moisturizer at night to allow all the goodness of the acne mud soap to be locked in .
Tip: Always remember to wash your hands before you apply your make up
Step 2

Image via Wikipedia
The next step is to start applying your make up for the look you want to achieve. If you don’t have a a Brush Set
don’t worry as you can also use your finger tips. The first thing we want to do is apply a base primer – I use the Smashbox Photo Finish Color Correcting Foundation Primer (Balance)
as it has a little silicon in it which makes your skin softer and smoother instantly and feels like silk on your skin. Apply a pea sized amount to your finger and apply to face. Now your skin is ready for the foundation. I don’t like to use thick heavy make up as I feel it clots up my skin and looks clumpy so I try to use a light liquid foundation after the primer – make sure the colour of the foundation matches your skin colour. Squeeze a small amount of the foundation onto the back of the hand you’re not using to apply and take from this . When you’re applying your foundation make sure you cover all of your face as sometimes people miss out the sides of the jaw or around the eyes. The purpose of the foundation is exactly as the name suggests.
Step 3
Wear illuminators to make your skin appear youthful and dewy compared with dull, matte makeup. Apply a little to the apples of your cheeks and leave to dry. You can buy different types of Gel Illuminator for Eyes & Face – 05 Bronze Namib
– you can mix some with your foundation or others you can use instead of blush.
Step 4
Take a fluffy powder brush and blend everything together, so that there are no visible lines or excess powders.
Step 5
Eyes. This is the bit I love – lining and dressing up my eyes. Line it with a soft black liner. If you want a night look, apply liner with very light strokes to the upper lid, stroking toward the outer corner of the eye. To blend, use an angle brush. For a more natural look, dip the angle brush in some of your darker eyeshadow. Use a very light amount, or use the applicator tip. For the bottom lid, use a very light amount on the outer corner. Try using the new RIMMEL GLAM’EYES LASH FLIRT MASCARA *BLACK*
– I’ve been testing it out and it is the best I have ever used, no clumps clots or thick corners.
Step 6
Most Eye Shadow colors come with two or three colors on the palette. The lighter color is for the lid. The darker color is for the crease on the lid, just below the eye bone. Apply the lighter tone first to the lid, spreading upwards to near the crease. For this, use the applicator that came inside the package. For the darker color, using your eyeshadow brush, dip into eye color and tap the brush to lose the excess. Apply inside the crease of the eye. You can find the crease by looking straight ahead. Your eye makes its own crease. Blend the color toward the outer corner of your eye. Sometimes you can blend it around to the bottom lid, but very lightly. The lightest color is for under the brow bone. Use the applicator to apply right on the brow bone just under the brow line. Make sure to use the larger eyeshadow brush to blend all the colors.
Step 7
Apply lip primer before your put on your lip stick. This stops the lipstick moulding into the cracks of your lips and gives a beautiful shine. I use the smash box lip primer.
Thanks for reading my introduction on how to apply make up like the professionals. I hope you found it helpful and if you have any make up or beauty question i’m here to help 🙂


You must be logged in to post a comment.